Auto Level | Its Parts, 3 Steps of Procedure and Advantages
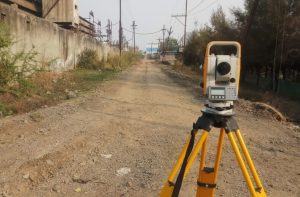
An auto level is a levelling instrument and used by contractors, builders, land surveying professionals for surveying, and auto level setup is fast & are easy to use, and saves time and money.
No adjustment for staff reading is required as the actual reading is seen from the eyepiece in the auto level and with any 3 screws available the bubble can be adjusted from any side and any angle.

As compared to the dumpy level the measurement accuracy of the auto level is higher and the auto level has an internal compensator mechanism that automatically adjusts the line of sight.
For fence builders, foundation installers, deck builders, swimming pool builders, landscaping pros, home builders, roadwork jobs, excavations, etc the auto level is a great instrument for surveying.
In the auto level, the telescope is fixed to its supports and for approximate levelling circular spirit can be attached to the side of the telescope, and a compensator is attached inside the telescope for more accurate levelling.

To level automatically, the compensator can help the instrument and consists of two fixed prisms and creates an optical path between the objective and eyepiece.
The compensator results in the optical system swinging into the exact position of the line of sight automatically due to the action of gravity but the compensator should be checked before the process of levelling.
Parts of Auto Level Instrument:
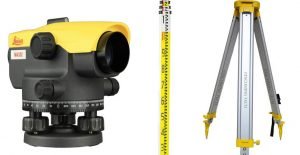
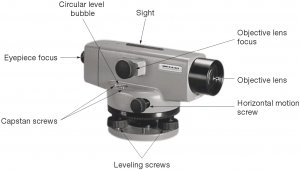
There are the following parts of the auto-level instrument such as;
- Automatic level.
- Levelling head with three-foot screws.
- A telescope that provides a line of sight to bisect the distant object.
- To make the line of sight horizontal, Bubble tubes are used.
- Tripod for supporting the instrument.
The Telescope of Leveling Instrument:
The telescope consists of;
- With a focusing arrangement, a body of the telescope.
- Object lens; At the front face, a combination of a double convex lens and at the back face a concave lens is used.
- Eyepiece; To effect the magnification of the crosshair of the diaphragm is the main purpose of the eyepiece and by object lens, the image is formed.
- Diaphragm; Inside the body of the telescope, it consists of very fine crosshairs bounded in a braising fit, and crosshairs are made of line platinum wires.
- The Line of Sight; To the direction of gravity through a system of prisms the line of sight is maintained perpendicular and when the instrument is approximately levelled this compensator maintains a horizontal line of sight.
Procedure:
At each setup of the instrument temporary adjustments are to be made as given below;
Setting Of the Level:
- Release the clamp screw of the instrument and in the right hand hold the instrument. By turning round only the lower part with the left hand, fix it on the tripod.
- Firmly screw the instrument and to the centre of its run bring all the foot screws. Spread the tripod legs and by pressing them with the hand fix any two legs firmly into the ground.
- To the right or left move the third leg until the main bubble is approximately in the centre or middle and move the third leg in or out for the bubbles of the cross-level to approximately become in the centre.
- When the bubbles are approximately in the centres of their run then fix the third leg firmly.
Levelling Up:
- To a pair of foot screws, place the telescope parallel and by turning the foot screws equally either both inwards or both outwards bring the bubble to the centre of its run.
- Through 90º turn the telescope and by doing this it lies over the third foot screw.
- without reversing the eye-piece and object glass bring the telescope back to the original position and until the bubble remains in the centre of its run in both the positions, repeat the operation.
- Through 180º turn the telescope and check whether the bubble remains central or middle.
Elimination of Parallax:
- From the object, the glass removes the lid and in front of the object-glass hold the sheet of white paper.
- Until the crosshairs are distinctly visible, move the eyepiece in or out and toward the staff direct the telescope.
- Until a clear and sharp image is formed in the plane of the crosshairs, turn the focusing screw.
| Point of Report | Level Reading | High-Cross Reading | Lower cross Reading | (HCR – LCR) X 100 | Dis b/w Automatic level, Levelling staff | Error |
| A | ||||||
| B | ||||||
| C |
Advantages of Auto Level:
There are the following advantages of the auto level such as;
- Using the auto level is very easy.
- For staff reading, no adjustment is required and from the eyepiece, the actual task is seen.
- From any side and any angle with any 3 screws, the bubble can be adjusted.
- This level has an internal compensator mechanism that adjusts the line of sight automatically.
- There is higher measuring accuracy.
- The results are very reliable in this method.
- These are easy to use and save money and time.
- The price of this level is affordable and low.
Disadvantages of Auto Level:
- The vertical angles cannot be measured at this level.
- At the auto level, the measurement of the horizontal angle is not very accurate.


